Part of the Mobile AI Content Creation: Complete Guide 2026 pillar series.
Professional Image Generation in Your Pocket
The barrier between imagination and visual reality has never been thinner. With Cliprise mobile, you carry a complete ai photo editor and picture generator in your pocket - capable of producing photorealistic portraits as an ai picture editor, surreal landscapes, stylized illustrations, and architectural renderings with quality that rivals dedicated desktop setups.
Note
When to use this guide: you want repeatable, app-native image generation on your phone (with seeds, aspect ratios, and downloadable outputs). If you also publish commercially, skim Safety & Copyright Essentials first so your workflow stays usable for client work.
This guide walks you through the complete mobile image generation workflow, from selecting the right model for your creative vision to downloading print-ready results.
The Mobile Image Generation Workflow
Creating AI images on mobile follows a streamlined process optimized for touch interaction and on-the-go creativity. Understanding each step helps you work faster and achieve better results.
Step 1: Access the Generate Tab
Launch Cliprise and tap the "Generate" tab at the bottom navigation. This is your creative command center, organized by media type.
Step 2: Select Image Mode
Tap "Image" to filter the model list to show only image generation models. Cliprise removes audio and video options, decluttering the interface to help you focus on image-specific choices.
Step 3: Choose Your Model
Scroll through available image models, each displaying:
- Model name and version
- Brief description of strengths and style
- Credit cost per generation
- Lock icon if the model requires a paid plan
Different models excel at different tasks:
- FLUX Pro - Photorealistic images, exceptional detail, follows complex prompts precisely
- FLUX Dev - Balanced quality and speed, great for experimentation
- SDXL - Versatile foundation model, excellent for stylized and artistic outputs
- Imagen 4 - Google's latest model, exceptional color accuracy and natural lighting
- Seedream - Specialized in dreamlike, surreal aesthetics
Tap a model to select it and proceed to the prompt screen.
Step 4: Craft Your Prompt
The prompt field is where your creative vision takes shape. On mobile, you have several input options:
Text Input: Tap the prompt field and type your description. Mobile keyboards support predictive text, autocorrect, and swipe typing for faster input.
Voice Input: Tap the microphone icon on your keyboard to dictate prompts using voice-to-text. Perfect for long, detailed descriptions that would be tedious to type.
Clipboard Paste: Copy prompts from notes apps, websites, or other sources and paste directly into the field.
Effective Mobile Prompts
Mobile prompting follows the same principles as desktop, but brevity can be valuable when typing on small screens. Focus on the most impactful keywords:
Concise but Specific:
Elderly jazz musician playing saxophone in dimly lit club, warm amber stage lights, smoke, cinematic film grain
This prompt is mobile-friendly - specific enough for great results, short enough to type quickly.
Expanded for Maximum Detail:
Close-up portrait of an elderly African American jazz musician, eyes closed in concentration, playing a brass saxophone in a dimly lit New Orleans club, warm amber stage lights creating dramatic shadows, wisps of smoke drifting through spotlight beams, shallow depth of field, cinematic film grain, intimate and soulful atmosphere, photorealistic
This expanded version takes longer to type but gives the AI more guidance. Use voice input to dictate it naturally.
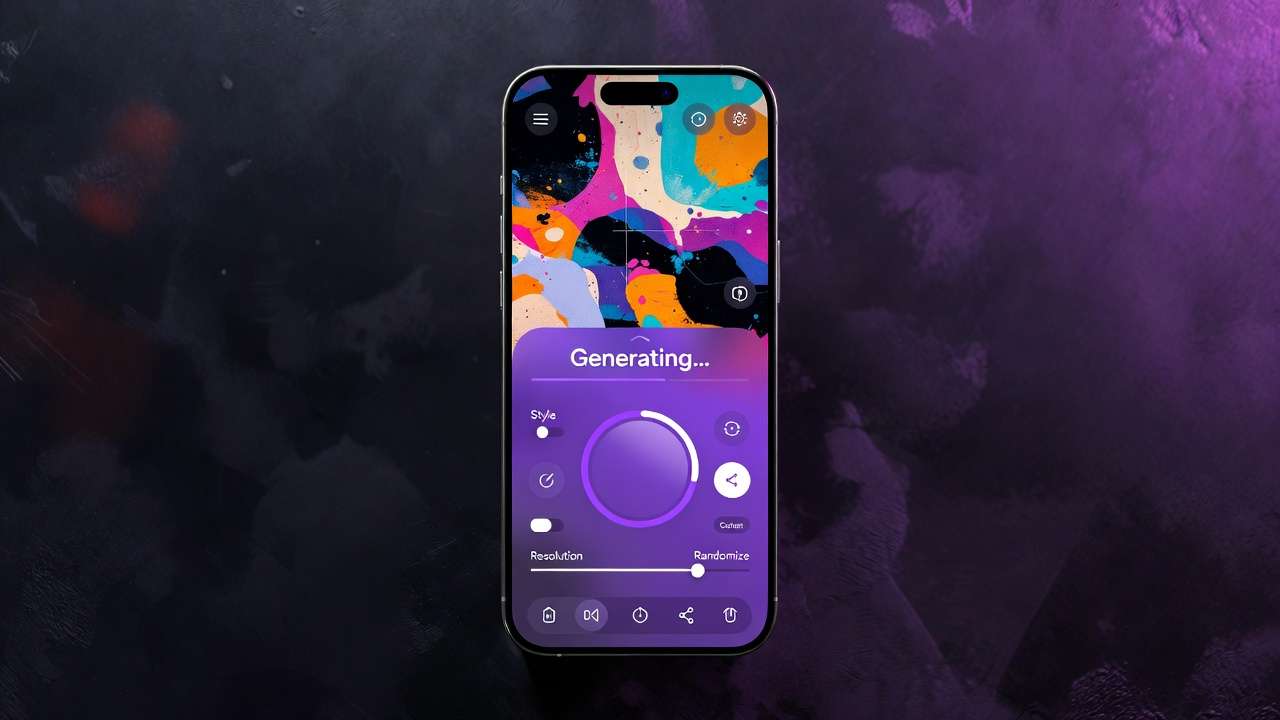
Step 5: Configure Image Settings (Optional)
Tap the settings icon to reveal advanced parameters. These are optional but powerful tools for refining output.
Aspect Ratio
Choose from preset ratios optimized for different use cases:
- 1:1 (Square) - Instagram posts, profile pictures, versatile format
- 16:9 (Landscape) - YouTube thumbnails, presentations, desktop wallpapers
- 9:16 (Portrait) - Instagram/TikTok stories, phone wallpapers, vertical content
- 3:2 / 2:3 - Photography-standard ratios for prints
- 4:5 / 5:4 - Instagram feed optimization
Select based on your intended platform and distribution.
Image Resolution
Higher resolutions consume more credits but produce larger, more detailed outputs suitable for print and professional use:
- Standard (1024px) - Perfect for web, social media, and screen use
- HD (2048px) - High-quality output for detailed viewing
- Ultra HD (4K+) - Professional-grade resolution (requires upscaler, available as post-processing)
Most mobile uses are well-served by standard resolution. Choose HD or ultra HD when output will be viewed at large sizes or used in print.
Style Presets (Flowstates)
Flowstates are predefined style keywords that automatically enhance your prompt with aesthetic guidance. They're especially useful on mobile, where typing long style descriptors can be cumbersome.
Available Flowstates vary by model but often include:
- Cinematic - Film-grade lighting, dramatic composition, depth of field
- Photorealistic - Life-like textures, natural lighting, camera-lens realism
- Anime - Japanese animation aesthetic, cel-shaded look, expressive characters
- Oil Painting - Classic painted texture, brushstroke details, artistic interpretation
- Cyberpunk - Neon-lit futuristic cityscapes, high contrast, teal and magenta tones
Tap a Flowstate to apply it. The style keywords are added to your prompt automatically.
Guidance Strength
Controls how strictly the AI follows your prompt:
- Low (20-40%) - More creative freedom, unexpected interpretations, artistic license
- Medium (50-70%) - Balanced adherence, follows intent while adding detail
- High (80-95%) - Strict interpretation, minimal deviation from prompt
Most users achieve best results in the 60-80% range. Experiment to find your preference.
Seed Control
Seeds are numerical values that determine the AI's random starting point. Using the same seed with the same prompt and settings produces consistent results, allowing you to generate variations with controlled differences.
- Leave blank for randomized output each time
- Set a seed to create reproducible variations
Seeds are advanced features most useful for iterative refinement. Beginners can safely ignore this setting.
Step 6: Upload Reference Images (Optional)
Some models support image-to-image generation, where you upload a reference image to guide the output. This is powerful for:
- Transforming photos into artistic styles
- Maintaining composition while changing style or subject
- Creating variations of existing images
- Preserving specific elements (pose, layout) while modifying others
Tap "Add Image" below the prompt field, select a photo from your device, and the AI will use it as compositional guidance.
Image-to-image credit costs are typically the same as text-to-image but check the Generate button for exact pricing.
Step 7: Review Cost and Generate
The Generate button displays the exact credit cost before you commit. Your remaining balance is shown at the top of the screen.
When ready, tap Generate.
A progress indicator appears, showing real-time status updates. Most image generations complete within 10-60 seconds depending on model complexity and server load.
Step 8: View Your Creation
Once complete, the image automatically appears in your Library. A notification alerts you if you've navigated away from the app.
Tap the image to view it full-screen. From here you can:
- Download to your device's camera roll or downloads folder
- Share directly to social media or messaging apps
- Edit using the built-in image editor
- Make Public to share with the Cliprise community
- Delete if you're unhappy with the result (credits are not refunded for successful generations)
Model-Specific Tips for Mobile
Different models have unique strengths. Here's how to get the best results from popular image generation models.
FLUX Pro
Best for: Photorealism, complex scenes, precise prompt adherence
Prompt strategy: Be extremely detailed. FLUX Pro excels when you specify lighting, materials, textures, and composition with precision.
Mobile tip: Use voice input to dictate long, detailed prompts naturally. FLUX Pro rewards verbosity.
Credit cost: Higher than most models, but results justify the investment for professional use.
FLUX Dev
Best for: Rapid experimentation, balanced quality and speed
Prompt strategy: Moderate detail works well. Focus on key subjects and overall mood rather than exhaustive descriptions.
Mobile tip: Perfect for testing prompt ideas before committing to more expensive models.
Credit cost: Mid-range, excellent value for iteration.
SDXL
Best for: Artistic styles, illustrations, creative interpretations
Prompt strategy: Include style keywords like "watercolor painting," "anime style," or "digital art." SDXL interprets artistic direction well.
Mobile tip: Combine with Flowstate presets for enhanced stylistic control.
Credit cost: Lower than FLUX, great for high-volume creation.
Imagen 4
Best for: Natural lighting, color accuracy, realistic scenes
Prompt strategy: Focus on natural descriptions. Imagen 4 excels at interpreting everyday language without heavy technical prompting.
Mobile tip: Great for beginners - forgiving of simple prompts while still producing quality results.
Credit cost: Mid-range.
Advanced Mobile Image Techniques
Creating Series and Variations
To create a cohesive series of related images:
- Generate your first image
- Note the prompt that worked well
- Save the prompt in your device's notes app
- Modify small elements (lighting, color, subject) while keeping the core structure
- Generate variations using the modified prompts
This technique is perfect for creating social media content series or exploring a concept from multiple angles.
Using the Prompt Enhancer
Some models offer a Prompt Enhancer toggle that uses AI to automatically improve your prompt by:
- Adding cinematic and technical keywords
- Improving lighting and atmosphere descriptions
- Enhancing compositional guidance
- Refining style keywords
On mobile, this is especially valuable when typing long prompts feels tedious. Write a simple prompt, enable the enhancer, and let Cliprise refine it automatically.
Trade-off: Enhanced prompts may deviate slightly from your original intent as the AI adds its interpretation. Toggle it on and off to compare results.
Image-to-Image Workflows on Mobile
Transform existing photos into AI-generated art using image-to-image workflows:
Stylization
Upload a photo and prompt: "Transform into oil painting style, impressionist brushstrokes, vibrant colors"
The AI maintains the photo's composition while applying artistic interpretation.
Subject Replacement
Upload a photo of a room and prompt: "Same room layout, but modern minimalist furniture, bright natural lighting"
The AI keeps the structure but modifies contents based on your description.
Enhancement and Upscaling
Upload a low-resolution or noisy image and prompt: "High quality, sharp details, enhanced colors, professional photography"
The AI reconstructs details and improves overall quality.
Negative Prompts on Mobile
Some models support eliminating artifacts with negatives - descriptions of what you DON'T want in the image. This is powerful for excluding unwanted elements:
Negative prompt examples:
blurry, low quality, distorted, watermark, text, signature
If available, you'll see a "Negative Prompt" field below the main prompt. Use it to refine output by exclusion.
Optimizing for Mobile-Specific Use Cases
Social Media Content Creation
For Instagram Posts (1:1):
- Use square aspect ratio
- Select standard or HD resolution (1024-2048px)
- Focus on bold, eye-catching subjects
- Prompt for vibrant colors and clear composition
For Instagram/TikTok Stories (9:16):
- Use portrait aspect ratio
- Standard resolution is sufficient
- Include text-safe zones in your composition by prompting "text space at top" if needed
For YouTube Thumbnails (16:9):
- Use landscape aspect ratio
- Generate at HD resolution for clarity
- Prompt for high-contrast, attention-grabbing imagery
Phone Wallpapers
Portrait wallpapers (9:16):
- Generate at HD or Ultra HD resolution
- Prompt for vertical compositions that work well when icons overlay the image
- Consider "simple background, focal point centered" for clean results
Landscape wallpapers (16:9):
- Same resolution recommendations
- Prompt for "wide vista, landscape" to fill horizontal space effectively
Profile Pictures and Avatars
Square format (1:1):
- Standard resolution is sufficient for most platforms
- Prompt for "centered portrait, simple background" to ensure the subject remains recognizable at small sizes
- Avoid overly complex backgrounds that become muddy when scaled down
Common Mobile Image Generation Issues and Solutions
Issue: Image Quality Looks Low on My Device
Causes:
- Generated at standard resolution but viewing on high-DPI screen
- Compressed version downloaded instead of original
- Model produces lower native resolution

Solutions:
- Generate at HD resolution for high-quality output
- Always download "Original" quality, not compressed
- Use the built-in upscaler for post-generation enhancement
Issue: Generated Image Doesn't Match My Prompt
Causes:
- Prompt was too vague or ambiguous
- Model doesn't specialize in the requested style
- Guidance strength was too low
Solutions:
- Add more specific details to your prompt
- Try a different model better suited to your style
- Increase guidance strength to 70-80%
- Use Flowstate presets to reinforce style keywords
Issue: Generation Takes Longer Than Expected
Causes:
- High server load during peak hours
- Selected model is computationally intensive
- Network connection is slow
Solutions:
- Generate during off-peak hours (early morning or late evening)
- Try faster models like FLUX Dev or SDXL for quicker results
- Ensure you're on a stable Wi-Fi connection
Issue: Credits Deducted But No Image Generated
Causes:
- Generation failed server-side
- Network interruption during processing
Solutions:
- Check your Library - failed generations automatically refund credits
- Pull down to refresh the Library
- Contact support if credits weren't refunded after 5 minutes
Maximizing Quality While Conserving Credits
Creating high-quality images on a credit budget requires strategic choices.
Test with Lower-Cost Models First
Use SDXL or FLUX Dev to experiment with prompts and find what works. Once you've refined your prompt, use FLUX Pro or other premium models for final, high-quality outputs.
This approach lets you iterate affordably before investing credits in expensive models.
Use Standard Resolution for Proofs
Generate at standard resolution to preview composition and style. If the result meets your expectations, regenerate at HD resolution using the same prompt and settings.
Leverage Daily Free Credits
Free daily credits reset every 24 hours. Use them for experimentation, testing new models, and trying creative ideas without impacting your subscription or booster credits.
Upscale Post-Generation
Instead of generating at ultra-high resolutions (which costs more credits), generate at standard or HD resolution and use the built-in upscaler tool to enhance quality afterward.
Many upscaling tools cost fewer credits than generating at native high resolution.
Exporting and Using Your Mobile-Generated Images
Download Formats and Quality
When downloading from the Library, you typically have two options:
Original Quality:
- Full-resolution output exactly as generated
- No additional compression
- Larger file size
- Best for professional use, printing, editing
Compressed:
- Optimized file size for sharing and storage
- Minimal perceptible quality loss
- Faster download on slower connections
- Perfect for social media and web use
Choose based on your use case. Social media platforms re-compress images anyway, making compressed downloads perfectly adequate. For print or editing, always choose original.
Sharing Directly from Cliprise
Tap the Share button to send images directly to:
- Social media apps (Instagram, TikTok, Twitter, Facebook)
- Messaging apps (WhatsApp, Telegram, iMessage)
- Cloud storage (Google Drive, Dropbox, iCloud)
Direct sharing from Cliprise preserves image quality and saves time compared to downloading first then uploading separately.
Making Images Public
To showcase your work in the Cliprise community:
- Open the image in your Library
- Tap the three-dot menu
- Select "Make Public"
Your image appears in the Home feed with your username and the prompt used, allowing others to learn from your technique and appreciate your creativity.
You can revert to private at any time.
Mobile Image Generation Best Practices
Save Successful Prompts
When a prompt produces excellent results, copy it to your device's notes app with a brief description. Build a personal prompt library for future use and reference.
Generate in Batches
If you're creating multiple images, queue several generations back-to-back. Start all generations, then review results together. This is more efficient than generating, reviewing, adjusting, and repeating one at a time.
Use Natural Lighting for Photography Styles
When prompting for photorealistic images, specify natural lighting conditions ("golden hour," "overcast daylight," "soft window light") for more believable results than artificial lighting.
Experiment with Aspect Ratios
The same prompt can produce dramatically different compositions at different aspect ratios. Generate a favorite prompt at 1:1, 16:9, and 9:16 to see how framing changes the impact.
Keep Reference Images Organized
If you frequently use image-to-image workflows, organize reference photos in a dedicated album on your device for quick access when needed.
Related Articles
- Mobile Apps Overview
- Mobile Models Guide
- Mobile Prompting Tips
- Mobile Video Generation
- Android AI Art: Complete Mobile Guide for Samsung & Pixel Users
- Mobile App Tutorial: Generate AI Videos on Your iPhone
What's Next in Your Mobile Image Journey
Now that you've mastered mobile image generation, expand your skills:
- Explore Mobile App Tutorial: Generate AI Videos on Your iPhone to bring your images to life with motion
- Learn Android AI Art: Complete Mobile Guide for Samsung & Pixel Users optimized for touch interfaces
- Understand the credit system to maximize your creative budget
- Troubleshoot common issues with our mobile FAQ
Your pocket-sized image generation studio is ready. Start creating wherever inspiration strikes.